Your cart
Close Alternative Icon
New scarves!

News

About My Process


This is my old press.  I don't use it much anymore.  When I was in college studying printmaking it was this way or the photocopier.

This is my new press.  Lately there has been a lot of discussion about what constitutes "hand made." So I thought I'd show some of the tools and techniques that I use to make things. 

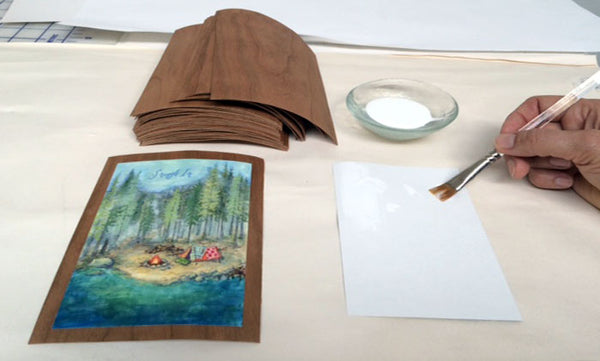
Most of my work starts with a painting.  Here is one of my recent landscapes, my gouache, and some favorite tools.  I also used my computer to view some pictures of Muir Beach and Muir Woods. The redwoods don't really come to the edge of the water, but now they do. The more I paint, the more I appreciate basic tools and techniques and simple paintings that aren't trying too hard.

It may seem like a contradiction that I like the old simple things and use a new inkjet printer, but it's all in the process.  It used to be that the folks who used the press in the top picture were considered graphic designers and the "fine artists" were the painters.  In fact my press came from a clothing store and was used to make signs that were thrown away as soon as the sale was over. Now, because of the invention of that printer in the middle picture, things seem to have flip flopped.

 The process is basically the same for most creative pursuits: get an idea, make a big mess, then tidy things up because they never end up looking just like the original vision in your head. In painting, the messy part of figuring out colors, textures, layers, and the push and pull of space and focus comes before the duplicating process.  In printmaking it happens right in the middle. But then, if I spit 100 prints out of my inkjet printer, they would be considered to be of a lesser value then the numbered edition of hand pulled prints. I'm ok with that.

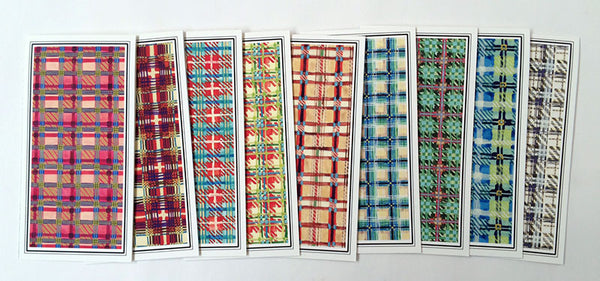
The goal of my new line of paper products is to hand-make gifts with the look of fine art paintings for when the occasion calls for more than a card, but less than an original. And to add a high level of craftsmanship that people want to keep around long after the occasion.

I often mount my paintings of wood. Which means I draw a cutting outline in AI and laser-cut it. They come out covered with tape and smelling like a barbecue. All the sooty edges need to be cleaned.

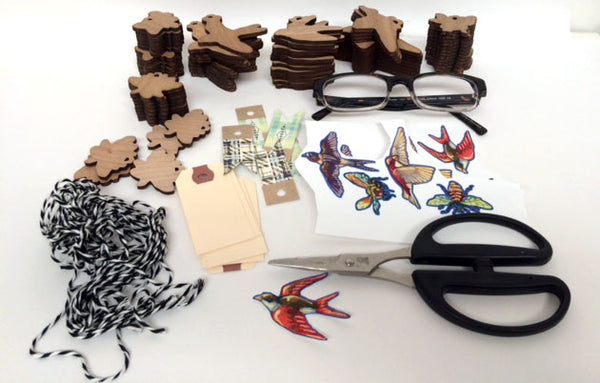
Then I put on some reading glasses and hand-cut all the tiny painted shapes that I have printed.  I make and stamp tags, string everything together, and tie lots and lots of knots before packaging it.

Sometimes I use a paper cutter instead of the tiny scissors.  It makes a great noise.

Sometimes I use a mat knife to cut wood veneer or paperboard.  Everything needs to be hand-glued.

And then they spend the night in another kind of press.

I designed the bases for the book boxes and had them made here in California out of recycled chip board. Then I cut and glue the covers myself.

I try to keep all the little bits organized in my vintage mail sorting station, but I won't pretend it looks this tidy all the time.

Can't wait to show you more. I hope you like to look at it as much as I like to make it.

Continue reading

Spring Birds and Bees Tassels

I have three new birds and bees ornaments in my shop. To celebrate spring, I designed this Tassel DIY to go along with them. Here in California, we didn't get a single day of rain in January, so it's hard to tell what season it is. But they're fun to make and decorate anytime.


And the ornaments make lovely valentines gift wrap.


There are three different sets of birds and bees.

To make the two larger tassels you'll need

SUPPLIES: A 12" x 12" piece of mulberry or other fibrous "rice" paper that holds up when wet, twine,  Elmers glue, and a cup of water.

 1. Fold the paper in half. Crease 1" down from the folded side. Cut into two pieces and cut fringe.


 Open each piece and roll it up.

 Twist the center to tighten it up a little. Tie the twine on one end and then wrap it around the center for two inches.

Fold the tassel in half and wrap a little more at the base of the loop. Tie it off.

 Mix about two TBS of glue with one cup water, stir well.

 Give the tassel a dip.

Here's the labor intensive part –  separate all the fringe and twist each piece between your fingers. Hang it up to dry then tie on any ornament.

Here is another slightly more complicated version that I made with the evil eye charms. 


Continue reading

Wrapping Presents

It's present season and my gift wrapping cart is ready to go.  I'm taking it out to craft fairs and stores. Here it is all folded up and ready to shove in the back of my car.


Unfold everything and it fluffs up quite a bit. This is the cart decorated for christmas.  It will get a new look for Valentine's day.  I'm peddling gift tags and craft kits to make locks and keys tags with golden chain.

Here it is at the Etsy craft fair at pier 35 in San Francisco.

Most of the gift tags are available in my Etsy shop.  This little reindeer book is a free download and DIY instructions from my Tiny Paintings Project.  Just click on the Tab in the upper right - it's #45.


If you give a gift to someone who will be walking around in the woods, hang a bear bell (or two) on it.

Bigfoot was the most popular monster at the show, even though he probably doesn't think of himself as popular.


I decorated a small tree with the jewels.  And the tree tags were popular gifts for brothers.


Bakery boxes with wash tape edges and sweet treats.


If you want to make your own version of the locks and keys the free download is week #21

The bells and whistles are also a free download from the Tiny Paintings Project. Look for #46.


I like to hang an evil eye here and there for protection.  This one is in the middle of a prize ribbon.  Stay tuned for an announcement about my upcoming instructional video on how to make fancy ribbons with Castle in the Air.

If you don't have a chimney, leave a key out for santa... and the tooth fairy and the Easter bunny too.


Continue reading

New items in my Etsy shop

Heart_bookshelf_web

Yea! Yea! Yea!

I'm starting to make products based on last years Tiny Paintings Project.  And my first ones are in my Etsy shop.  You can buy them either as a craft kit packaged in a custom made book box, or as finished tags. The craft kits make great gifts on their own, and the finished tags are great gift toppers. Hang them anywhere you would hang a tassel.

Heart_open_web

Heart_keys_web

Diamond_keys_web

Eye_keys_web

Continue reading